Monday, May 31, 2010
Wednesday, May 26, 2010
Monday, May 24, 2010
Titanium Update !
I am still amazed at how many titanium frames I get from all over the world for restoring, and updating to new disc brake mounts. Shown are two of my older bikes that were in for refinishing, and one was going from canti studs to the classic Roller Cam brake set up. The Merlin came in from the UK for a new disc set up and new drive train cable mounts. It's a lot of fun getting them back into shape!
29er Type II Forks!
I want to share with my customers some of the processes of building their frames. I have missed taking some process photos because I have only two hands , but hopefully these photos will help understand the building process. These next photos will be the building of 29er , disc mount , Type II Forks. This part of the blog is dedicated to a few of my customers who want to follow the process of the build. All of them live pretty far away, Colorado, Canada, and Spain. Thanks Jesse, Richard and Antonio. I hope to show some finished Type II Forks in my blog in the next few days that are going to Europe this week.
Tacking Fixture
This is the blade to drop out fixture for proper alignment for tig tacking the parts together . This is just one of the many fixtures I have made, it seems you need a fixture for every process you do in the building of a bike frame and fork. I literally have all of my drawers and cabinets filled with fixtures. That is why most bike builders gulp when someone asks the question " do you have a frame fixture?" We wish it were that easy, but figuring out the fixtures and building them is part of the fun of being able to build a straight reliable frame, fork or any part for that matter.
" Fluxed" and Ready To Braze
The fork parts have been fluxed and are ready to braze. The flux helps protect the surface of the metal from forming oxides on the metal during heating and also helps as a wetting agent, ( it helps the brass flow easily during the process). Since these forks are going to have disc mounts, I use a heavier cap for the disc side to help with the additional loads from the disc mount.
Just Brazed
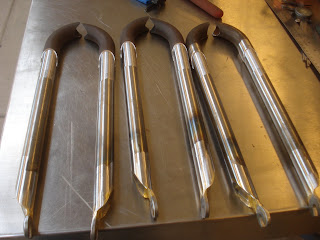
After the drop out is tig tacked to the fork leg, the drop out is first brazed to the fork leg, and while still hot, I set the half round cap end on and finish the final brazing all in one process. I was hoping to have some brazing photos, but Cowboy ( our family dog) has not learned how to work my camera yet, but were working on that .


